How to build a Single Stage Phase Changer.
After playing around with my normal Hailea Chiller and the occasional Dry ice sessions I wanted to build a Single Stage Phase changer. Please do take care and note our disclaimer Disclaimer – Globetrotter Tech
Reading up on various articles its clear there has been a lot done about 6-8 years ago on the topic. Unfortunately many of the articles found also links to websites and pictures that no longer exist. Thus it is not straight forward to get as unit together. I will here show in detail what I have done in a way that hopefully can be replicated. I don’t consider i have built an optimum unit and I am still learning but it should be possible to replicate what i have done.
Equipment needed for a Single Stage Phase Change cooling system
- Evaporator – the cooling block for the CPU
- Condenser – similar to a radiator.
- Vacuum pump (AC pump.) 1/4 HP pump in my case
- Filter/drier.
- Fan. 220V high speed industrial type to get some proper airflow.
- Capillary tube 1/4 or 1/8 0.26mm or 0.28mm
- Copper tube. Id 4 mm od 6 mm
- Refrigerant Gas. HFC-134a non toxic non flammable
- Start switch 220V with big buttons for turning off.
- Access Valve 1/4″ SAE * 1/4″ OD * 4″ Stem Core AC for filling gas
- AC pipe insulation tube.
- sturdy mounting plate.
In addition you will need the following material for putting it all together.
- Vacuum manifold same as used for filling fridge or car AC units.
- Refrigerant. In my case R-134A (it is a non toxic gas so good to start with)
- Brazing torch/Gas. In my case MAPP gas.
- Brazing rods – just get the Harris US made ones as they simply work!
- Sandpaper.
- Dremel high speed grinder.
- vacuum pump 1/4 hp for – 30 psi pressure.
Evaporator.
I bought a good efficient evaporator unit from Bartxstore.com You will have to put it together yourself thus the suggestion is to learn how to braze on some copper tubes before you actually work on the evaporator itself.

To put together the evaporator my proposed way is to start brazing the center copper tube on to the round cover top. you will need to rig it up so it is stable and with pipe straight and measured on the underside so it will fit snug to the bottom of the bigger evaporator bottom afterwards.
Once that is brazed then position the smaller tube for the capillary tube mounted also so it will reach the bottom of the evaporator block. Braze it in place.
it is much simpler to braze the 2 tubes onto the top lid of the evaporator when it is not mounted in the bigger evaporator block as you will not have to heat up the full block each time. As copper lead away heat efficiently this also apply when we braze.
Once the 2 tubes are brazed to the lid only then insert the top lid to the bigger evaporator block. The capillary side should be positioned so the gas takes the longest route to reach the output pipe. Bartx has made everything very snug and with good tight tolerances so make sure the tubes are aligned.

To braze the lid top the block will require significant amount of heat and i did the same outside when it was getting dark as then i could see the block heated up until it was red.
How to do copper brazing and which brazing rods to use.
I read a lot of different ways with different kinds of brazing rods with more or less silver and more or less copper and using brazing flux. I tried different ways but most advice was simply crap to me and meant the brazing would not work fully which meant I would continuously find small leaks here and there. When you think the surface is hot enough… heat it some more! the brazing material will then flow properly.
In the end the best way I found was to use absolutely no! flux. And to use only the Harris USA made silver Brazing rods. With those it works like a charm. To note is that its important to clean all surfaces with sandpaper fully. All oxidization residue must be gone.

If a Braze fail grind it down with a dremel machine and start again. Its better and easier to braze onto copper than on a layer of already brazed material. I learned that the hard way.
Once you get the heat up try to ensure you braze the full lid onto the evaporator block in one go. Then let it cool down slowly. Do not cool it down in water.
Once that is done then you can clean up all the residue of oxidization on the block.
I did a simple test of blowing into the big pipe covering the capillary tube while lowering the set into a glass of water. No bubbles mean its sealed. (might not mean it is sealed enough to take 150 PSI of pressure though)
Lapping the Evaporator block after brazing.
Once the evaporator is put together its a good idea to lap the evaporator block so it is smooth. The handling while doing the brazing could mean you have managed to get some parts uneven on the edges.
I lapped my block with wet sandpaper 300 – 400. You need to do this on a very smooth surface like a large piece of straight glass or as in my case on the marble floor (as mine is smooth and straight. No pressure on the evaporator just make sure it does not tilt.
You can lap it with finer grain to your liking but I did not do so for this attempt.
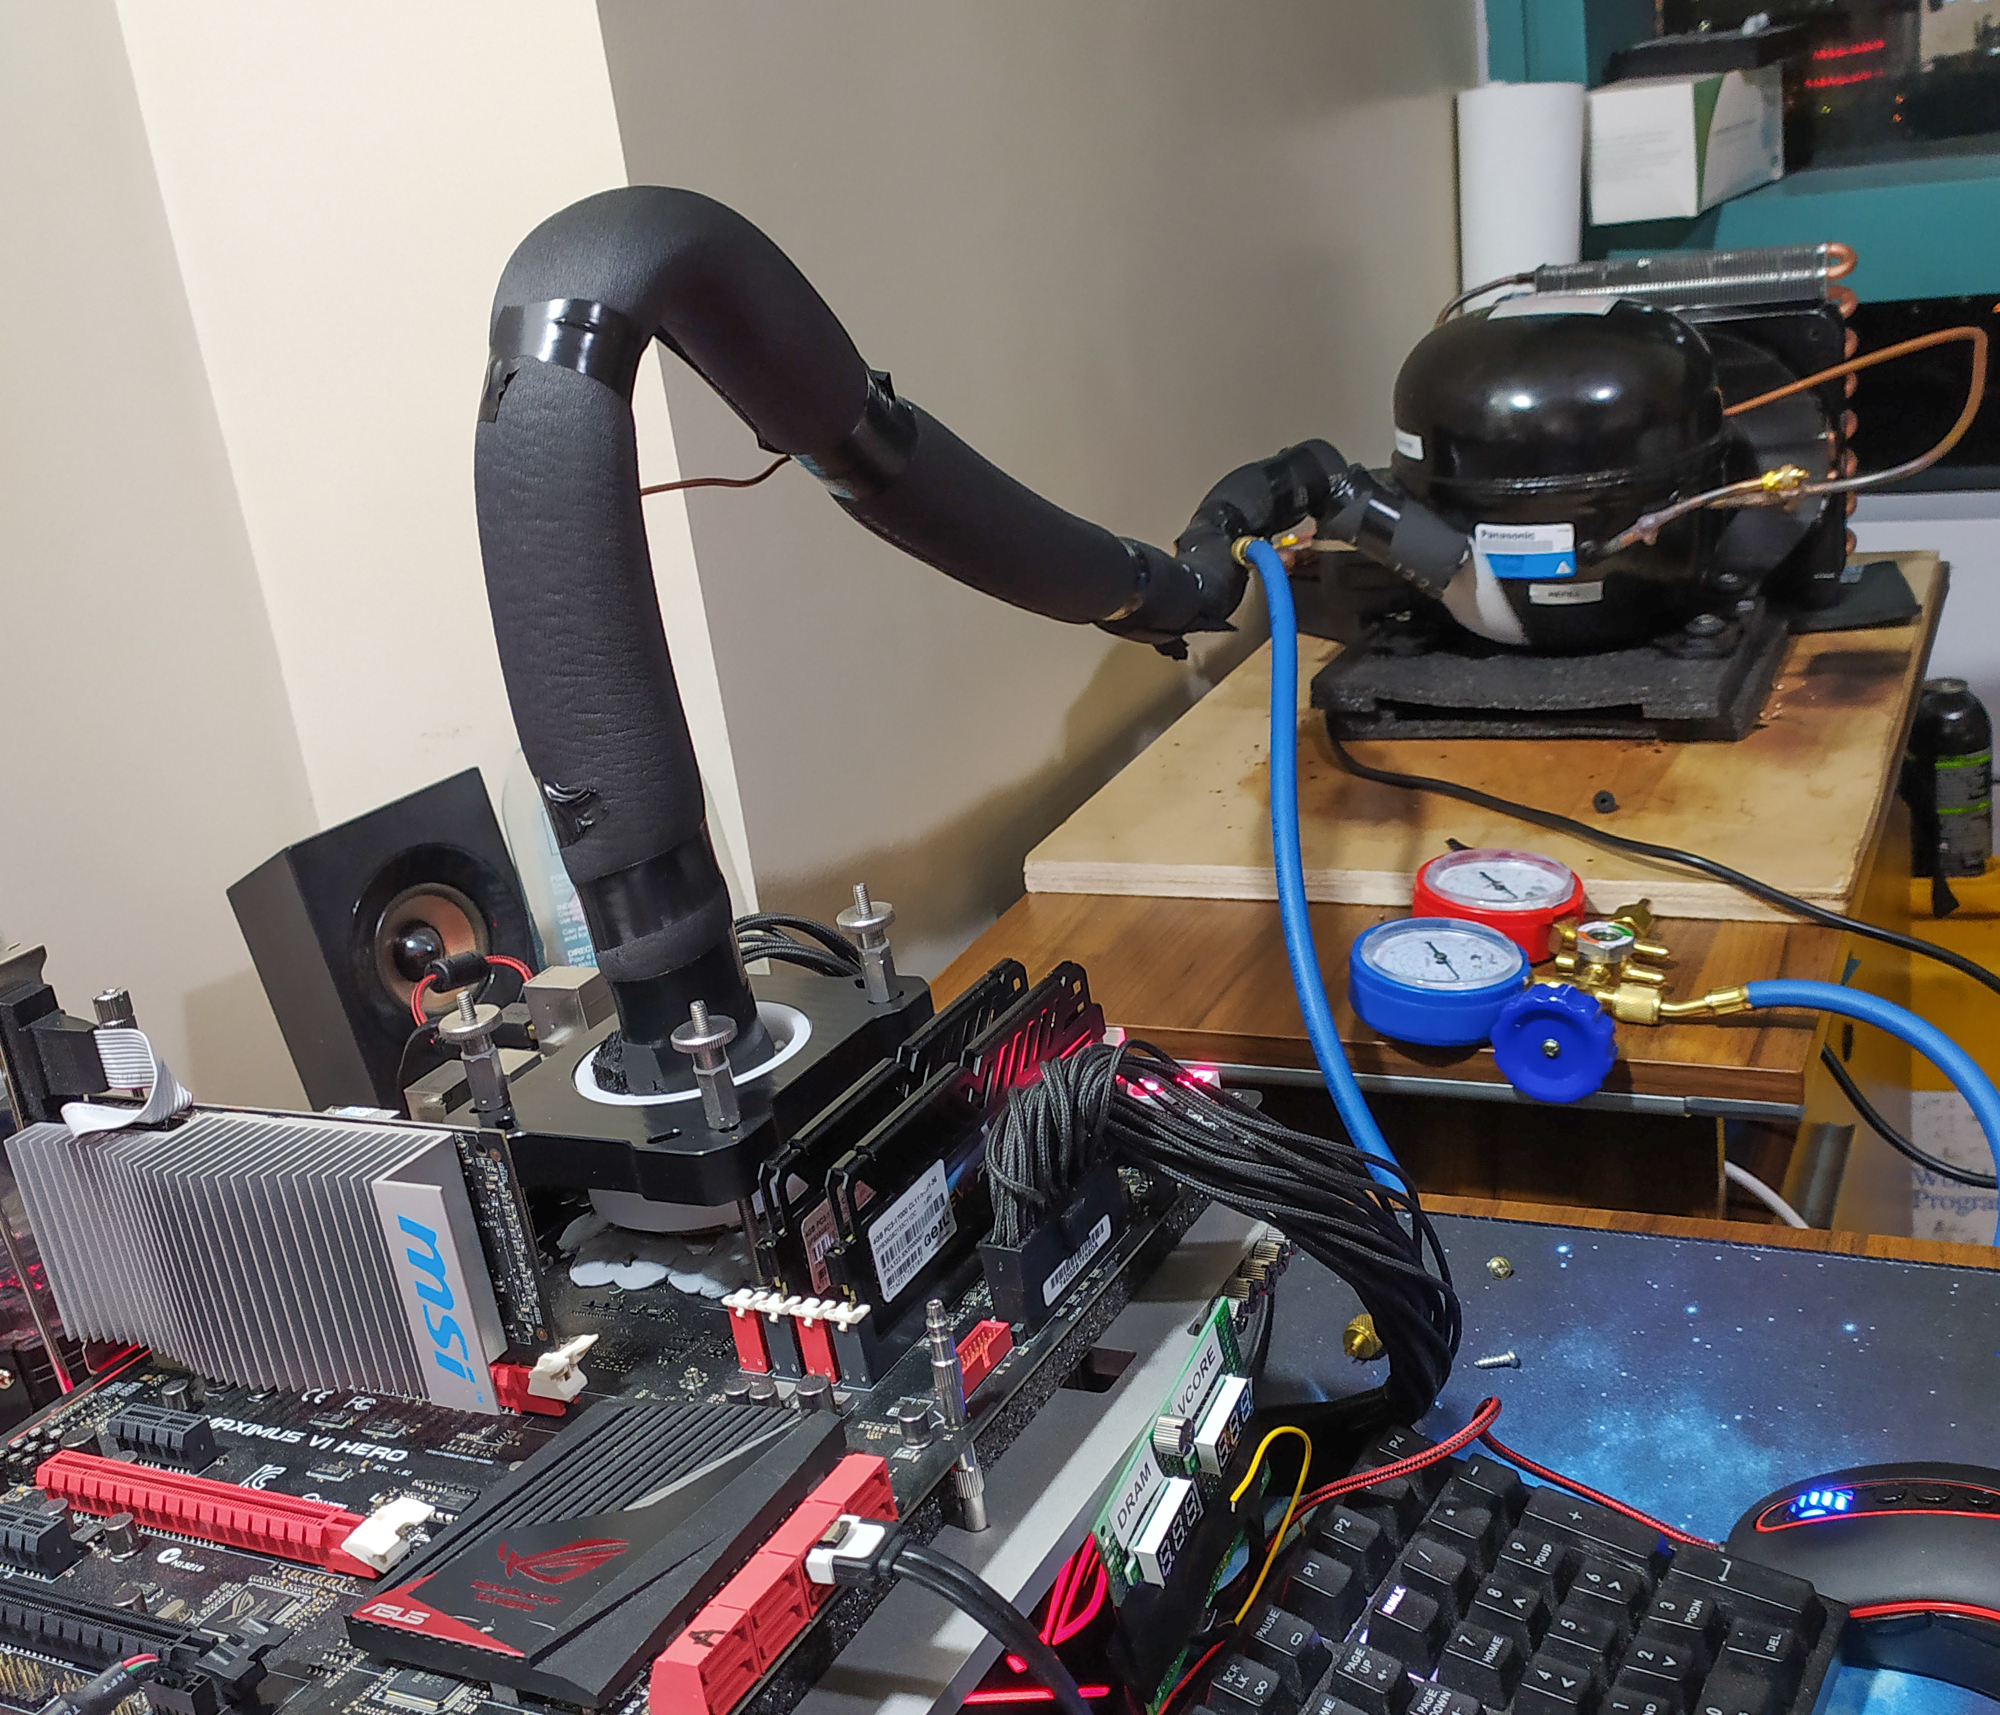
Putting together the SS Phase unit

I designed my unit so it has a copper tube 50 cm long from the discharge (or process) port from compressor to the top of the condenser unit. Then a 20 cm long tube from the low outlet of condenser and into the filter drier. I connected a 90 cm Capillary tube from the filterdrier to the small tube on the evaporator.
Then I connected a 70 cm tube from the bigger outlet of the evaporator going towards the suction port on the compressor.
I brazed all the tubes together at their joints but did not connect it to the compressor yet.
I in stead brazed on one access valve on to each end of the pipes so I could connect the manifold on to both ends and then connected a vacuum pump to the system and open the valves to see if i can get vacuum in the system. Once i reached -30 psi I close the valves and let it sit for 6 hours. I confirmed that there were no leaks since the pressure remained same.
Once that is completed then I disconnect and braze the compressor onto the tubes.
Using Manifold and how to fill gas in SS Phase unit.
When using the measuring manifold make sure to connect the correct pipe ends to the manifold as one side is made fully open while the other end will have a push tip to open the connector valves on the unit.

Without any gas i then started the compressor for 5 minutes to see that a pressure is created in the system. I then turned the system off again. IF there is any leaks there will be a hissing sound. You can also check with soap water at all the joints. (dont do this too long as there is no refrigerant cooling the system)
If the unit is completely sealed then it is now time to put the whole set into vacuum with the vacuum pump on. Open both the high valve and low valve and let it run for 30 -45 minutes. While the meters will quickly go to -30 psi the longer pumping helps evacuate any moisture from the system. Then close the valves again.
Now connect a closed can of 134A to the center of the manifold.

Start the compressor unit on the system itself and slowly let in ac coolant from the low end. You will need a pressure of around 40 -50 PSI on the low end. Once you reach that close of the valve again so the system is closed.
Let the system run for 30 minutes then turn it off. With the system off the pressure should even out after an hour or so between the high and low end.
How to test the Phase Changer.
Place the evaporator head on to a small surface with a temperature probe under it. If your surrounding temperature is around 20 – 22 C the numbers i give from now on should be more or less what you get.
It takes about 5-7 minutes to reach – 22 -23 C on the unit idle. At first i did not reach this as I had overfilled the unit with gas. Thus I only reached about -10 – 15C. My pressure on the low side had been around 60- 70 PSI when this happened. I let out some gas so it was showing 40 PSI with system off.
Now when I run the system at 40- 50 on the low end the unit on the high side will show me 110 – 130 PSI. With this i keep getting -22 – 23 C at idle. Clearly it is not optimised as in theory I should be able to reach -30 to -35 C.
Testing of the load range.
To test out what i could use the system for i set it up with my 10900K and Asus Apex XII system. I mounted a Temperature probe right on the processor edge inside the socket so it touches the CPU. Idle temperature was – 22.8C.
I dialed in 5400 Mhz 1.4V on the cores and started with 2 cores active going up to 5 cores each level with hyper threading on. All other values at standard bios setup. I then ran a WPrime 1024 session to see what results it would give me at the end of each session. ofcourse the session in Wprime gets shorter with each core I add.
Test result for a Single Stage Phase Changer for CPU.
2 Cores 84W -19C external probe with a max core temp at 32C as measured by coretemp
3 cores 110W -14.7C with a max core temp at 43C.
4 cores 141W – 9C with a max core temp at 52C.
5 cores 172W +2C with a max core temp at 71C.
Final conclusions
It is very clear that the phase changer will only be able to run systems with 4 cores or less as built. That still gives me plenty to play with in terms of old hardware I have. I would not propose anyone run the system so that it reach positive temperatures on the evaporator as that inherently would mean that any condensation ice would melt and drip down or condensation turning to liquid on several places of the system.
Using the system after the initial tests have me running a 4770K at up to 5200 – 5300 Mhz for both WPRIME,GPUPI, Cinebench at around 1.45 volts. With the drop in temperature i don’t have to be so aggressive on increasing the voltages as i would have to be on the chiller that i could cool down to around 3C. So there is a definite gain and much more relaxed OC-ing compared to keeping up with the Dry ice. (not that the frequencies and temperatures are in the same range. It however give me more room to test out setups with negative temps before getting dry ice.
There is more to try and will update with some results and general findings later on. I have posted the initial results on https://hwbot.org/user/matsglobetrotter/
I have had some kind users on hwbot give me advice on how to build the unit and more info can be found on https://community.hwbot.org/topic/200246-is-there-any-company-that-still-sell-cpu-evaporators-for-ss/